WELCOME TO FORGE LIFE!

Hey, fellow Forgers, welcome to Forge Life!

You can use either the Site Navigation Bar to the left or the Site Index link right above here.

Look around, find what you need, and (PLEASE) let me know if it was helpful. Also, if you can't find the answer, ask!

Big Point: Leave TONS of Comments, I really want to know what you think of the site and Handbook.

Don't ask about tagging, I wrote a guide for that, you can get there from the sidebar on the left.


Wednesday, October 20, 2010

HAY! I've been working on some new maps.


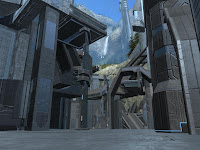
I've been working on a sweet Castle Map for Invasion Game Types, it hasn't seen spawns placed just yet, nor objectives, but it HAS been set up so that the draw bridge is fully functional on the switch from Phase 1 to Phase 2 and the Throne slides to the side and a wall slides up on Phase 2 to Phase 3. Here are some kick-ass schreenshawts.


I also did some work towards one of my arena maps, The Thunderdome. I'm still working on fixing the teleporter spawn in's and will be releasing two versions, one for classic arena play, where two players fight to the death each round (the only issue I have found is that the game puts the same two players in the ring at once every round), and one for elimination and continuous games (which is already working quite well).


A spin off of this concept is also in the works where up to eight players can spawn in separate arenas, fight to the death, move to new ones, fight their new opponents, and continue till the last man is left alive. Teleporters will be used to force movement at the end of the 1st, 2nd, and 3rd minutes of each round, and if both players are somehow still alive, they will both put in the next "ring."


I have some other maps that are complete or nearing completion as well, such as Bone-Saw, formerly known as Bellows, which has seen a redesign of the bases, as well as fixed objectives; it now supports Assault, CTF, Territories, Infection, Stockpile (don't trust me on that one) and Juggernaut.

U-Turn is soon to be revisited and adjusted to be more visually appealing.

Playing off of Godly Perfection's Inception Concept, I too have made some infinite loop-esque maps, including Ascendant Nightmare, a dark, vertical spiral, of crossed ramps and eerie ambient sound. Ascendant Night mare is finished and in my file share. I have also done considerable work on Hexception, where the direction of the ramps is influenced by hexagonal pillars instead of square based pillars and a version of his original with flipped ramps and lips to make travel between levels possible during games such as Flatline, a game type developed by Godly Perfection.

The End Game Map has seen only a few adjustments and I have tasked a few of my Xbox Live friends to finish the objectives and spawning so that the screenshots can be taken and the Invasion Guide finished.

My Coagulation remake has seen a serious overhaul of parts of the bases and some weapon layouts to further account for Reach scale and the optimum placement of objectives in the center offset by the imperative ROCKET SPAWN, as well as the addition of Active Camo, Oversheild, and the Banshee Carney Hole above Blue Base.

I can't think of much else that I'm doing, but be sure that it is a lot more than I could hope to fit in this post.

Keep reading, stay 1337.

Thursday, October 14, 2010

And the Train Kept a' Rollin'... [BIG UPDATES]

...Just don't stop.


PRECAP (Like a recap, just earlier) : Invasion and Spawning Guides have seen Major Updates, more below.


Hits are slowly climbing back up to what they used to be, thanks much for the support, but I've still noticed that no one is commenting. I've continuously told you, my readers to challenge information if you think it to be wrong or to help me add to the collection. I DO get hundreds of UNIQUE hits everyday, and I am looking for others to help with the upkeep of this site; but all I have at this moment are persons I trust that aren't competent enough to make original content with this kind of content and competent persons I don't quite trust with access to the finer points of this page.

Start commenting and this will become more than just a resource with an attached image gallery (of only one person's work, which I would like to rectify), it will become an online community in itself. We've already got more Forge 2.0 Technical content than ANY other location online, INCLUDING Johnny O'Than' s new "ForgeWorld" group. 

I would like to thank him, however, because he has finally provided the few nuggets of information that I have been trying to discover for some time now relating to Spawn Ordering and Respawn Influencers. But, before I get into that, and the implications he seems to love to ignore to explain (that, my friends, is the edge I will ALWAYS push myself to have), I'd like to remind everyone that the Invasion Guide has seen another installment and has only 2 or three more to go before I'll deem it complete, which shouldn't be long now.

Also, to anyone who may or may not read this, I am not conceited, nor do I find myself better than Bungie, I, just like anyone else with even an average intellect, am simply able to tell if their is more water (information) in one glass (my blog) than another (Bungie's Guides).

Click "Read More" to see the rest of the information on Respawn Influencers (Regular, Weak, and Anti Respawn Zones) or go to the side bar and check the Spawning Guide to see if I've had a chance to update that bit yet.

Wednesday, October 13, 2010

Roll The Dice...

...'Cause it's time for the End Game.

I've been working as around the clock as possible to finish up the comprehensive Invasion Guide, making visual aides, writing bits here and there, finding the right wording for processes and concepts, and making sure I take into account that I am biased towards explosions.

The latest addition, even newer than the stuff I haven't shown you yet, is the super delicious map, currently known as End Game, and guess what. I've got SCHREENSHAWTS GALORE.

You are about to do this right hur...

0.0 .... :D

...so click to see the rest.


Saturday, October 9, 2010

Soooo...I've been busy.

Quick update, just wanted everyone to know that I'll have the rest of the Invasion Guide up as soon as possible. New classes, more work, more baby, some slack shall be cut, by you. But for reals, maybe you could comment on the other stuff.

Also, I apologize for the broken links in the Sidebar, which have been fixed, and the broken links in the index, which I haven't yet gotten to. Give me a little bit, I'll get it going.

Stay 1337.


[UPDATE]

After work tonight, I plan on cleaning up the whole of the blog, testing all of the links, and fixing any information that might need it, as well as replacing the Respawn Zone visual aides.

PLEASE, let me know if you see anything that needs fixing so that I can get it done faster.


Also, "Bellows" has been renamed "Bone-Saw" and is ready for play testing. Let me know if you want in on it. You must friend request me, I'm not going to type in every GT sent to me and sit there for an hour adding all of you. Sorry 'bout that, just not my cup of tea.


HEY! We just passed 1,000 unique hits this last weekend, thanks for everything, sending people here, and coming back; this stuff takes motivation like that.


Stay 1337.


[MOAR UPDATE]


Um...I think I broke it...


So I was sitting in Forge...and I think I just exploded Forge World. I decided to build another Invasion Map, but in reverse of what I had in The Bladed Isle, and much more ridiculous. For starters, I had no idea that I'd be able to do this much with the budget, it's just insane how much I've been able to fit on this map, and have only used 2/3 of it. Just keep your eyes peeled for when I post images of the different areas and buildings and such and for when I post invitations for play testing.

Also, there shouldn't be any broken links anymore.

Stay 1337.


[Quickie Update]

I had, like, 3 minutes to spare this morning, so I made this:

Difference Clouds FTW!

I call it, "Fix your spawns Bungie."

Tuesday, October 5, 2010

Setting Up An Exceptional Invasion Experience [Updated: 1/20/2011]

[This post is long, drawn out and has multiple sections; I am not yet able to control your scroll bar with hyperlinks, so use the Post's Index to get a general idea of ordering. Oh yeah, don't forget to click on the Post's title or "read more" to see the rest of the post!]


As always, let me know if you see something missing, but do remember that this specific post is being pieced together over time and that, if you see a placeholder item, I'm most likely going to get to it. You are also encouraged to challenge the information here; don't go off insulting me or my intelligence, but if you see it a different way, let me know as the opinion of others is greatly appreciated.


--------------------------------------------------------------------------------------------------------------------------------------------------------------------------------------------------------------------------------------------------------------------


Index:


Items tagged [Incomplete] are in progress, while those tagged [Coming Soon] have yet to be started. Finished Items are tagged with their original completion date, updates with be noted below them.


Introduction [10/05/10]


Choices [10/05/10]
Updated: [10/14/10]


Map Construction [Incomplete]


Placing Objectives [10/27/10]


Spawning [10/28/10]


Visual Aides [1/20/2011]


Invasion Slayer [11/13/10]


----------------------------------------------------------------------------------------------------------------------------------


Introduction:


The main issue with custom content Invasion Maps is that they are just that, maps; when designing for Invasion, you must think of it as an experience, not just the map, not just the game type. Imagine playing a Gladiator or Mortal Combat game type on Hemorrhage, or a Fat Kid (Infection) Map, with a normal Infection Variant; the maps require the specifically crafted game types to work and play the way they are meant to.


----------------------------------------------------------------------------------------------------------------------------------


Choices:


In making maps for the Invasion game type one must think of certain things, such as whether they want Spartans or Elites to be the Invaders, what the objectives will be in each phase, what areas will be accessible during each phase, what weapons, armor abilities, and vehicles will best accent those spaces, and how the player will decide to move about them. In this guide, we will travel through the series of choices one must make in planning an Invasion Experience.


----------------------------------------------------------------------------------------------------------------------------------


First Choice:


Who will be the attacking team? Spartans? Elites? It does matter, and it is extremely important that you take into consideration the strengths and weaknesses of each, such as the Spartans smaller hit-box and more acute maneuverability, or the Elites greater strength, speed, and their ability to fully recharge their health. Thinking of this, the Spartans will have an advantage in tighter spaces, until the Elites are right on top of them, and the Elites will be better suited to covering large distances with sparse cover, but will not do well in close quarters if outnumbered, even if the player is usually quite competent in those situations.


This is influenced by the Team Color of spawn points, objectives, and, most importantly, THE GAME TYPE SETTINGS. Building the map for attacking Spartans and using Invasion: Boneyard will definitely cause unpleasant gameplay.


Second Choice:


What layout will you use for the Phases? Between Assault, Capture the Flag (Core), and Territories, there are 27 different permutations to choose from. For example, Bungie's Variants are Territories, Territories, CTF, on both Boneyard AND Spire.


Third Choice:


Now that you know how you are going to do the Phases Objectives, you need to decide how each Phase will play, and how you will segue (sehg-way) between them. Will the first phase require that the attackers overpower a set of vehicles and then defend themselves as they wait for the bomb to arm? How much distance will they have to cover? Will there even be vehicle combat at this point? What kind of cover will be available? How spread out will the fire teams be? Will there even be spawns for the specific fire teams?


Fourth Choice:


Are you finally going to build the damn map? YES. So do it.


----------------------------------------------------------------------------------------------------------------------------------


Map Construction:


Now that it is time to build the map, you need to understand some dos and don'ts of objective placement.


For Territories:


Make sure that the Territory has multiple access points, is not free standing (meaning that it has a wall or something against it), can't be blasted by the enemy tank (if applicable), and doesn't function as a grenade funnel (ribbing to catch grenades is one thing, but a two by two slot in the wall is a no-no; think about the Territories for Phase 2 on Spire, if a grenade explodes on one side, and you are hiding in the other, it only does about half of a melee worth of damage because it's far enough away).


Depending on the layout of your map, it may be better to have 1 Territory instead of two, but make it larger and/or encompass more rooms or floors than just one.


For Assault:


Make sure the bomb spawns in a place that the defenders can't easily camp, especially from a distance. Also, depending on how long you want it to take to arm and detonated, you will need to adjust the defendability and/or distance from the defenders and attackers spawns. For an interesting twist, you could spawn the bomb on top of the capture point, maybe set it as one second arm and detonate, that could be fun. For real.


Make sure that the path to the bomb plant point is easily traversable, with good cover, long sight lines for the attackers to provide cover and keep watch of their teams' backs. Also make sure to provide some choke points, even if only one, for the defenders to have advantage in some locations.


For CTF:


Have an interesting, multilevel, area, with multiple entrances and no perfect cover for the core to spawn, or don't, a cluster fuck is a cluster fuck. Exits should exist on all levels, with multiple on the the main level and bottom level (gravity influences gameplay big time). Place the capture point in an aesthetically pleasing location that can be accessed rather easily, without a chance of automatic core reset (capture point on bridge over water, core falls in water, resetfail).


Make sure that you follow the same rules for that path as the bomb travel path, and make multiple paths the player can take if you can. You can make it more open, and quite vulnerable, if you want, but make sure to give the attackers good paths to the main path or paths.


----------------------------------------------------------------------------------------------------------------------------------


Moving On:


Now that you have a better understanding of how to make Objective spaces work, how to craft their entrances, exits, and how to keep it fair between attacking and defending teams; take note that I only said "better." Now, with that said, some of you may very well understand this bit, and would like to be moving on, so we will.


When you actually build the map, there is a good chance that you wont want to follow Bungie's example to a 't,' that you wont want everything to be completely linear as it is in Spire and, to only a slightly lesser degree, Boneyard. The reason Boneyard is different is because it has the player backtrack almost directly toward earlier play spaces when attempting to capture the core.


Because of this, you may also want to have some areas serve multiple purposes, which is imperative for smaller maps, and can also lead to much more interesting games, (here comes the important bit) when done correctly. For example, using the Bomb Travel path(s) as the Flag Travel path(s) can be a good move, but if too few options are available to the player, which could be caused by paths not being accessible while traveling in the "retreat" direction (specifically, when the have the core), could make the available paths become the proverbial cluster fucks I was referencing, because they would be very predictably traveled, and very easily camped.


With those things said, we all know that you can choose to stack objectives in a certain area across the Phases, but take into consideration that Invasion is mean to have a progression, to be linear to a point, and that that same progression is what is needed to keep the gameplay alive and to save it from feeling dull.


It is a good idea to make your players have to travel to reach a destination, say, the Objectives, but if you make them travel long distances on foot, continuously, they will soon lose interest in the tedious nature of the gameplay. To be honest, Spire's first phase is not truly successful in this, especially with the transition to the second, as the objectives are behind access points, behind paths, behind entrances, meaning you have to walk across a large portion of the map, only to navigate the inside of a smaller space, which can end up taking as long as the first bit, only to have to go through yet another transition into the objective space; the terrain preference towards the attacking team in the first Phase does balance this out, but gameplay is still tedious.


Provide faster ways to reach the destination, whether they be Man Cannons, Vehicles, or what have you, but remember to counterbalance them with something for the defending team. Make the Man Cannon take shields away, but drop a player in an area that is stil relatively safe, or have them be shot out in to the open, so the defenders can see them coming, or take potshots at them. You could make the area leading directly into the destination tighter, causing people to have to decide whether or not to ditch their vehicles, or give the defenders a vehicle deterrent, preferably one that is more effective against vehicles and less effective against players themselves, so as not to be overpowered. There are so many ways that these experiences can be made interesting, ways that areas can come together, that there is almost no reason to have duplicate objective systems within ones own creations; even if you do Territories, Territories, CTF in four maps, you can stil make them play very differently, which will keep your selection, and subsequent gameplay, fresh.


Placing Objectives [Incomplete]:


During an Invasion Game, as you should well know by now, you are able to place numerous objectives, and can do so a number of ways. For instance: Territories, Plant Points, and Capture Points, all require areas, and can be active at the same time (Say what?!?). If you were to place two Territory objectives on a map, with a bomb spawn set to the same phase (also in the game type settings), you would have the option of capturing the Territories OR planting a bomb at any one of them. This goes the same for spawns for the Power Core, it just doesn't explode and is instant upon entering the zone rather than counting down to arm and then again to detonate; this is important to consider as core carriers tend to be made slower than other players, as well as bomb carriers, and bomb carriers are also able to punch for a one shot kill while core carriers are quintessential sitting ducks.


Once again, take note that Territories, Plant Points, and Capture Points all require that an area be set to function (and that this area cannot function with a zero for any horizontal axis value or zeros for both vertical values at the same time; i.e. you should be able to see the barrier).


So, aside from setting up dual objective phases and confusing the hell out of players, you can also make games simple to play, just remember that.


[Also, just because I just thought of it right now as I typed this, I'm making an Invasion Football game, and it's going to kick your ass. BTW, I'm not a sports fan, so don't expect biased gameplay, it will function as best as the system allows; I DO actually know the rules and how the game works, I just find watching other people play it boring and would rather be doing it myself.]


UPDATE: I made it, the map is Titled The Gridiron and the Game Type is Titled, Running the Gauntlet, both are in my fileshare and displayed in the "My Maps" link to the left.


------------------------------------------------------------------------------------------------------------------------------------------------------------------------------------------------------------------------------------------------------------------------


- OBJECTIVES -
Step By Step:


Territories -


1. Place Hill Marker


(You can use a Flag Stand, Capture Plate, or even other items, but try to stick to what you know, or do your own experimentation to figure out which ones will work for you.)


2. Hit "X" - Select "Advanced"
3. Set "Team" to Attacking Team Color
- Blue - Elites
- Red - Spartans
4. Set "Spawn Order" to the Phase in which it will be active (1,2, or 3)
5. Adjust the Size and Shape via the Area settings near the bottom
6. Set the Tag to "INV_OBJECTIVE"
7. Place the object where you want it


Bomb Spawn -


1. Place Hill Marker


(You can use a Flag Stand, Capture Plate, or even other items, but try to stick to what you know, or do your own experimentation to figure out which ones will work for you.)


2. Hit "X" - Select "Advanced"
3. Set "Team" to Attacking Team Color
- Blue - Elites
- Red - Spartans
4. Set "Spawn Order" to the Phase in which it will be active (1,2, or 3)
5. Do not set an area. The bomb will spawn at, and fall from, the bottom center of the hill
marker and can also spawn into rolling down a slope.
6. Set the Tag to "INV_OBJECTIVE_FLAG"
7. Place the object where you want it


Bomb Plant -


1. Place Hill Marker or Capture Plate


(You can use a Flag Stand or even other items, but try to stick to what you know, or do your own experimentation to figure out which ones will work for you.)


2. Hit "X" - Select "Advanced"
3. Set "Team" to Attacking Team Color
- Blue - Elites
- Red - Spartans
4. Set "Spawn Order" to the Phase in which it will be active (1,2, or 3)
5. Adjust the Size and Shape via the Area settings near the bottom
6. Set the Tag to "INV_OBJECTIVE"
7. Place the object where you want it


Core Spawn -


1. Place Hill Marker


(You can use a Flag Stand, Capture Plate, or even other items, but try to stick to what you know, or do your own experimentation to figure out which ones will work for you.)


2. Hit "X" - Select "Advanced"
3. Set "Team" to Attacking Team Color
- Blue - Elites
- Red - Spartans
4. Set "Spawn Order" to the Phase in which it will be active (1,2, or 3)
5. Do not set an area. The core will spawn at, and fall from, the bottom center of the hill
marker and can also spawn into rolling down a slope.
6. Set the Tag to "INV_OBJECTIVE_FLAG"
7. Place the object where you want it


Capture Point -


1. Place Hill Marker or Capture Plate


(You can use a Flag Stand or even other items, but try to stick to what you know, or do your own experimentation to figure out which ones will work for you.)


2. Hit "X" - Select "Advanced"
3. Set "Team" to Attacking Team Color
- Blue - Elites
- Red - Spartans
4. Set "Spawn Order" to the Phase in which it will be active (1,2, or 3)
5. Adjust the Size and Shape via the Area settings near the bottom
6. Set the Tag to "INV_OBJECTIVE"
7. Place the object where you want it


------------------------------------------------------------------------------------------------------------------------------------------------------------------------------------------------------------------------------------------------------------------------


 - SPAWNING -


To begin with, decide where you would like to have each team begin, remembering which team is attacking, which one is defending, and that Spartans are RED and Elites BLUE (sides switch every other round). Once you have, place the spawn points.


 1. Spawn an Initial Spawn Point
 2. Hit "X" - Select Advanced
 3. Set "Team" to respective team
 4. Don't bother changing other settings.
 5. Place the spawns, avoiding them facing walls and such.


Now, the hardest part of Invasion, the Respawn System:


To set up a spawn areas and locations, you will use Tagged Hill Markers. There are also a number of different types of spawn areas that can be created, via a combination of 2 factors, with two options each: Backfield Spawns vs. Forward Spawns and Team Spawns vs. Fire Team Spawns. It is important to understand that you can only choose one of those per set.


Backfield Spawns are usually near a team's Initial Spawn, while Forward Spawns are the areas that begin to become available as the Phases progress (if you would like to have forward spawns during the first phase, make sure to don't overpower their position and that you do not place too many in any single Phase, as spawning will get confusing).


NOTE: The direction that the "Spawn Point" at the base of the Hill Marker is facing is the direction that a player will spawn facing and that a player may change their spawn direction by looking around, with the rotational axis being on the center of the same Hill Marker; if they do look around, they will spawn facing the direction they are looking when the respawn timer clocks out. Because of this, do not place the Hill Markers INSIDE anything (yes, people do this, it's ridiculous).


Of course, you may want to know how to set up the Hill Markers to make them work correctly, so I'll tell you, based on the kind of Spawn Area you want and the properties they require to be changed.


Backfield Spawn (Is active for ALL Phases):
Tag: INV_RES_ZONE


Forward Spawn (Is active for ONE Phase):
Tag: INV_RES_P[X]  (Insert active phase for X)


Team Spawn:
Spawn Order: 3 or higher


Fire Team Spawn:
Spawn Order: 0, 1, or 2 (for Fire Team 1, 2, or 3, respectively)


REMEMBER: The Hill Marker is set to the team. Initial Spawns do not need to be within Hill Markers. Respawn Zones (Regular, Anti, and Weak) DO NOT influence Invasion.


----------------------------------------------------------------------------------------------------------------------------------- -------------------------------------------------------------------------------------------------------------------------------------


Visual Aides [Incomplete]:


READ THIS ---> The Map in the Aides is set up to play as Territories, Assault, and then CTF. It is also not to scale, and is very generalized; soon I may be able to post images of what this map would actually look like, but until then, use commons sense.


THIS TOO ---> There are multiple levels, the blue areas are ABOVE the ground level, the green areas connect the ground level to the upper levels and upper levels to higher levels even still (this map has 3 levels total). Spawns will placed as the farthest forward object, but most of these are located at ground level, save the ones placed on the blue area adjacent to, but not within, the building.


AND THIS ---> Also, the Spawning Aide will be, when added, located in a blank area, no map at all, just an organized grid to help you visualize what is required to have the spawns set up correctly. The Phase Arrangement images make it seem like I used Respawn Points, this is untrue, the Respawn Areas are simply depicted as  a grouping of Respawn Points.


General/Image Keys


Phase Arrangement


Notice also the slight change in the positioning of some of the spawn points from the second phase to the third; this is to allow for variation of movement between the forward shove of and the push-pull of CTF gameplay.


------------------------------------------------------------------------------------------------------------------------------------------------------------------------------------------------------------------------------------------------------------------------


Invasion Slayer [11/13/10]:


When crafting games for Invasion Slayer, both in the map design and game type editing, you are actually doing something rather peculiar. The game is best explained as a team King of the Hill game, where points are earned via kills and where hill captures lead to bonuses that assist in the gathering of kills. On top of that, you have to consider the fact that your map and game type will have to be able to cope with three different sets of weapons and abilities that are available to the player, at all times; you don't have the luxury of leaving the jet pack areas near the end of a game inaccessible, players should be able to traverse the entirety of the map for the entirety of the game. They should also WANT to use the whole map, much unlike during games on Boneyard where the regular Invasion start point is basically never seen. You can't make the map super huge and expect it to just play well, you have to make it so that players can traverse it from nearly every start point in a timely fashion; this is further assisted by the players ability to choose their spawns.

Setting up a map for Invasion Slayer is actually quite simple. Your Spawn System will be very similar to regular Invasion, save that it wont have to have a linear progression, it could simply adjust itself for the addition of Jetpacks, rotate spawn locations around the map, or push players to spawn closer and closer together as the Tiers are unlocked. The rest of the map should be set up to play well as a BTB slayer map, as well as having  accommodations for the vehicles you will likely have spawn in during the later rounds. You will then need to place your hills, which don't need to be placed equidistant (equally far) from each team, but do need to be at least a certain length away, so that it is not extremely easy for any one team to control them; think of this bit as being akin to Stockpile, making it so that some territories are easier for some teams to get, some are rather equal, and the rest are favoring the other team. Just remember not to give too much favoritism at any given point. 


Something to consider would be making it so that areas of the map become available with the new Tiers being unlocked, just like in regular Invasion, things like this will really open up your map and make playing on it interesting, removing any feeling of the game being too long or drawn out.

Game Type Settings will be discussed in further detail in the future, just remember that you get to choose the rewards for hill captures for both sides, as well as 3 sets of Loadouts for both sides.

It must be a secret...

...because Bungie wont tell us shit.


Soooo…I've been working through spawn order items, sometimes alone, sometimes with a bit o' help. This morning, I got to do some spawn zone testing, with full consideration for both weak and high, and spawn order settings.


I don't have much time before I pass out, soooo…

Essential Bits:

From what we can tell, spawn order does not hold much, if any influence, over where you REspawn.

Respawn Zones are basically the devil and suck. Don't use them.

Weak Respawn Zones are much better for nixing spawn killing.


To be more precise, it seems that the point of respawn is chosen based upon where you died, and where enemy players are. When you have multiple respawn zones, you will spawn in the farthest one from your death, but when you have weak respawn zones, you will spawn farthest from death, relative to threats wither in, or near, a weak respawn zone. Mixing the two is fail, respawn zones beat out the other too much. 


Basically, make your map using WEAK zones with higher numbers for places you would like players to spawn more often.


I have some other info for spawn points and respawn points spawn orders, but I'm too tired to word it.


Another thing, I'd love for a Bungie Employee to just come out and tell us how the f*** this s*** is supposed to work. Johnny O'Than's guide is ok, much better than mediocre even, but he leaves so much information out. This is understandable only because the article is labeled to contain information only pertaining to tags, but outrageous because I'm sure he knows more about the Spawn Zones and spawn orders that he isn't telling.


Right now, my guide is the premiere location for Forge 2.0 Technical information and how-to, but I can't seem to make it better without someone a little higher up. BTW, finally looked in the instruction manual for Reach, great job sending us to a website (Bungie.net) that didn't have a guide, for days, and still doesn't have a competent one, Bungie. I'd love to see if you can figure out how that makes sense, right after you fire the guy who placed the initial spawns in Countdown and Zealot; it is so much fun to watch the other team spawn right before you, line up their shots, and kill your whole team within 3 seconds at the start of each game of SWAT. You guys need to learn how to use your tools.


I've taken steps to pry information from them (asked a question in O'Than's thread), I just hope the information in unambiguous.


Stay 1337.

Saturday, October 2, 2010

So I played some Arena, and noticed some issues....(Beware: Trigonometry and Regular Expressions Within)

People still quit and it hurts their team just as much, if not more.


Bungie already has a thread that explains Ratings in the intel area in the sidebar, however, it seems that they've ignored a few bits of explanation, particularly the modifiers for assists, deaths, and betrayals. I've also, via general musing and a background in integral calculus, found several ways in which it could be modified to protect players from their teammates detrimentally effecting their scores. 

I know it is just a game, which is why people play it to enjoy it. It is hard to enjoy something when those around you are completely disregarding the fact that you are their to enjoy yourself. Imagine going to a restaurant where the persons next to you are deciding to showcase their explosive flatulence or going to a wedding where the drunken best man proclaims his love for the bride, I would see these intentional suicides and team killing respectively; however, my modification protects against quitters.